CrateDB on Azure VMs
Getting CrateDB working on Azure with Linux or Windows is a simple process. You can use Azure’s management console or CLI interface (Learn how to install here).
Azure and Linux
Create a resource group
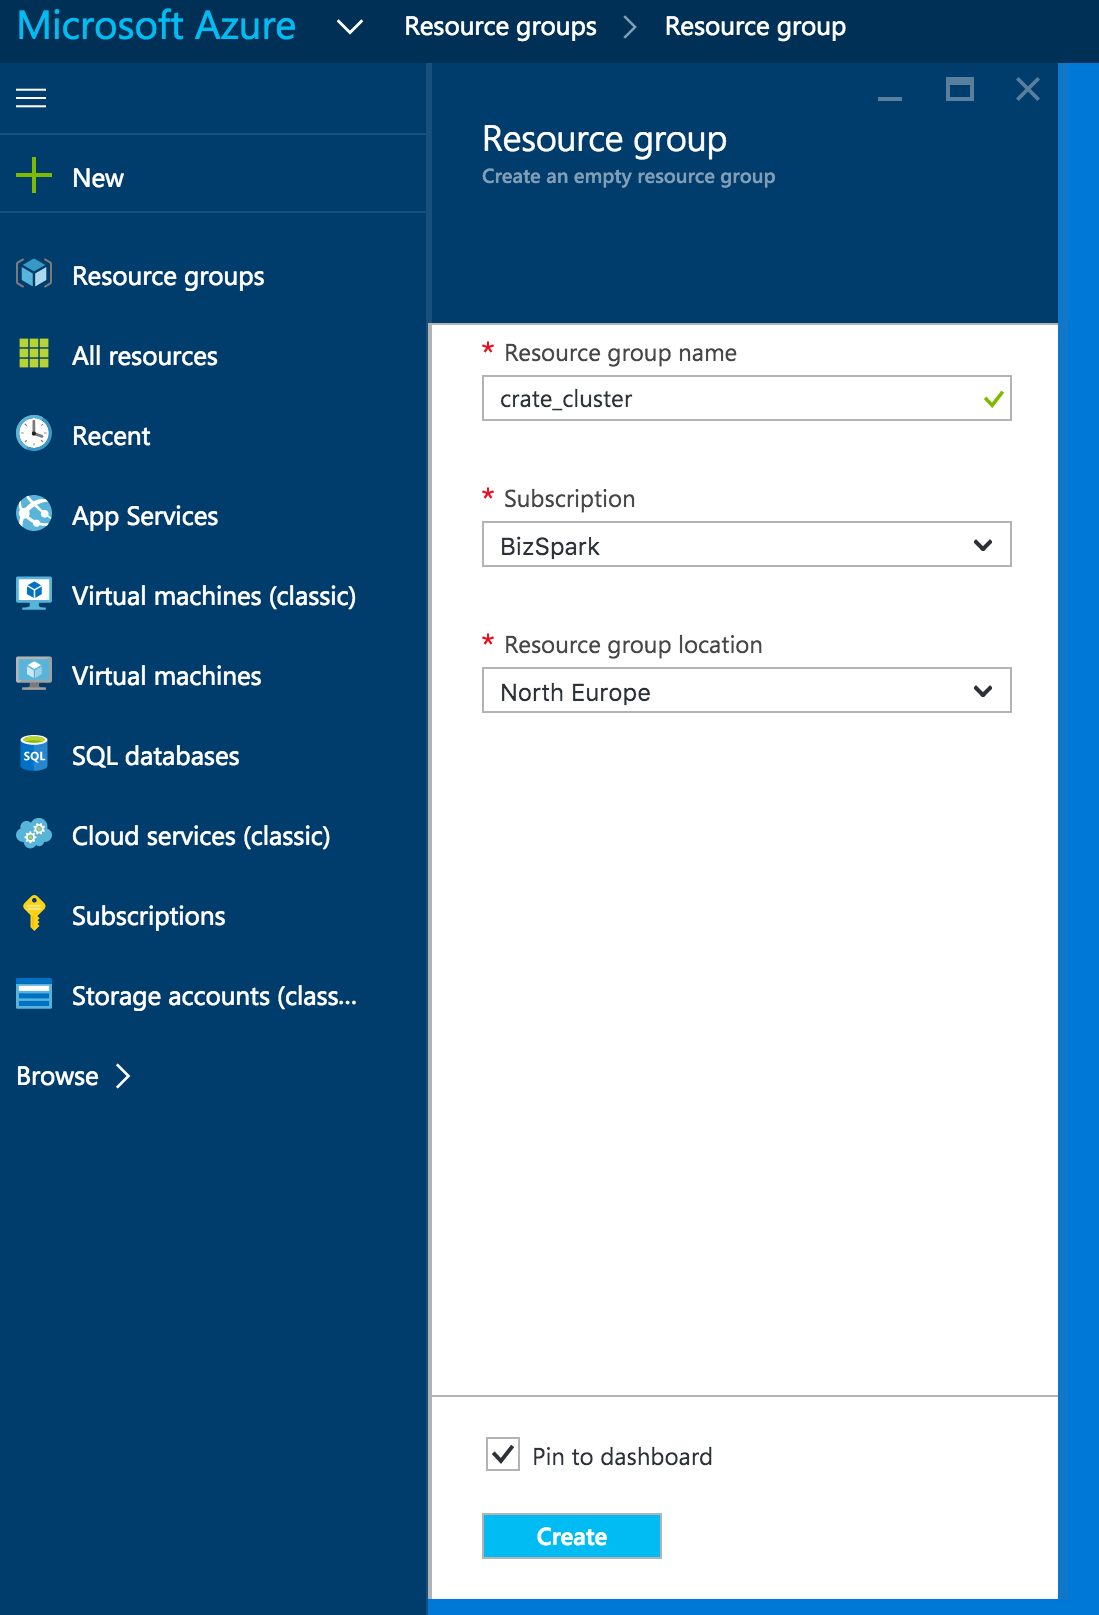
Azure uses ‘Resource Groups’ to group together related services and resources for easier management.
Create a resource group for the CrateDB cluster by selecting Resource groups under the new left hand panel of the Azure portal.
Create a network security group
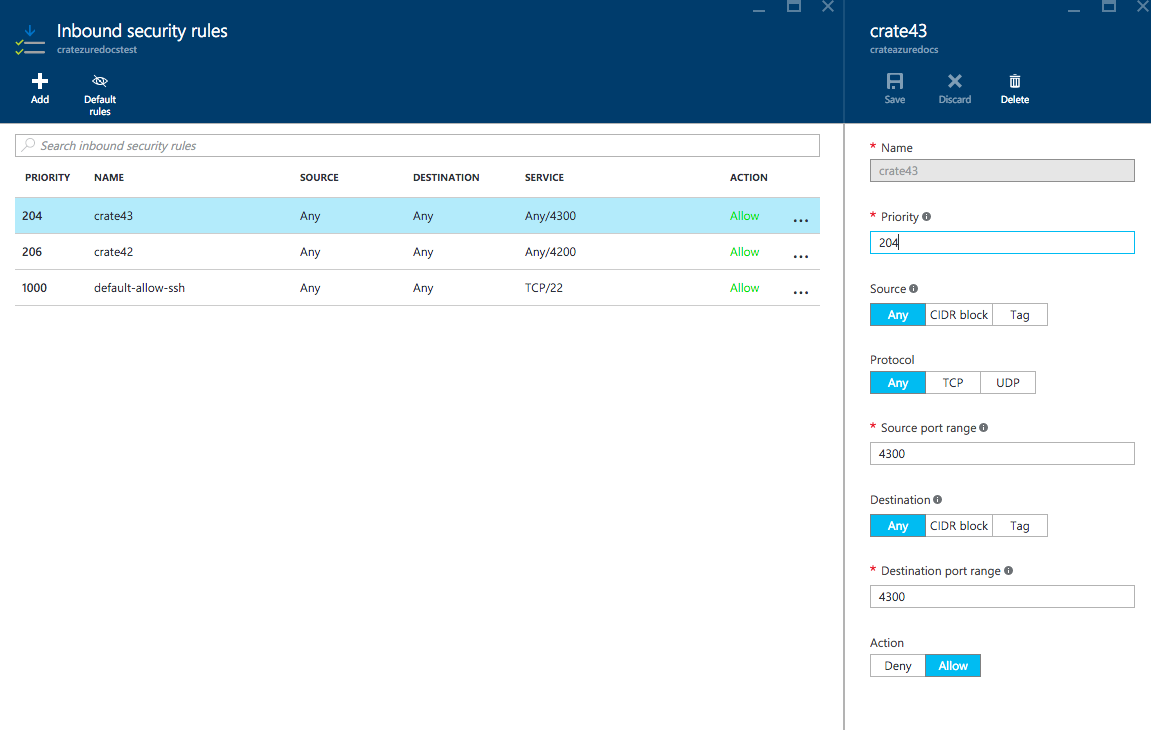
CrateDB uses two ports, one for inter-node communication (4300) and one for
its HTTP endpoint (4200), so access to these needs to be opened.
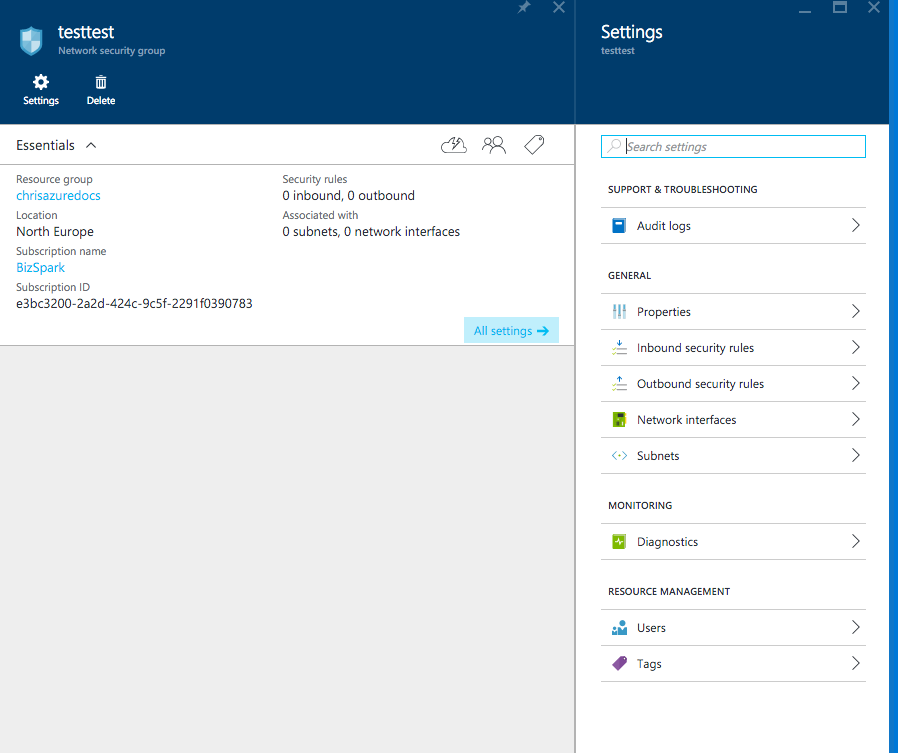
Create a New Security Group, giving it a name and assigning it to the ‘Resource Group’ just created.

Find that security group in your resources list and open its settings, navigating to the Inbound security rules section.
Add a rule for each port:
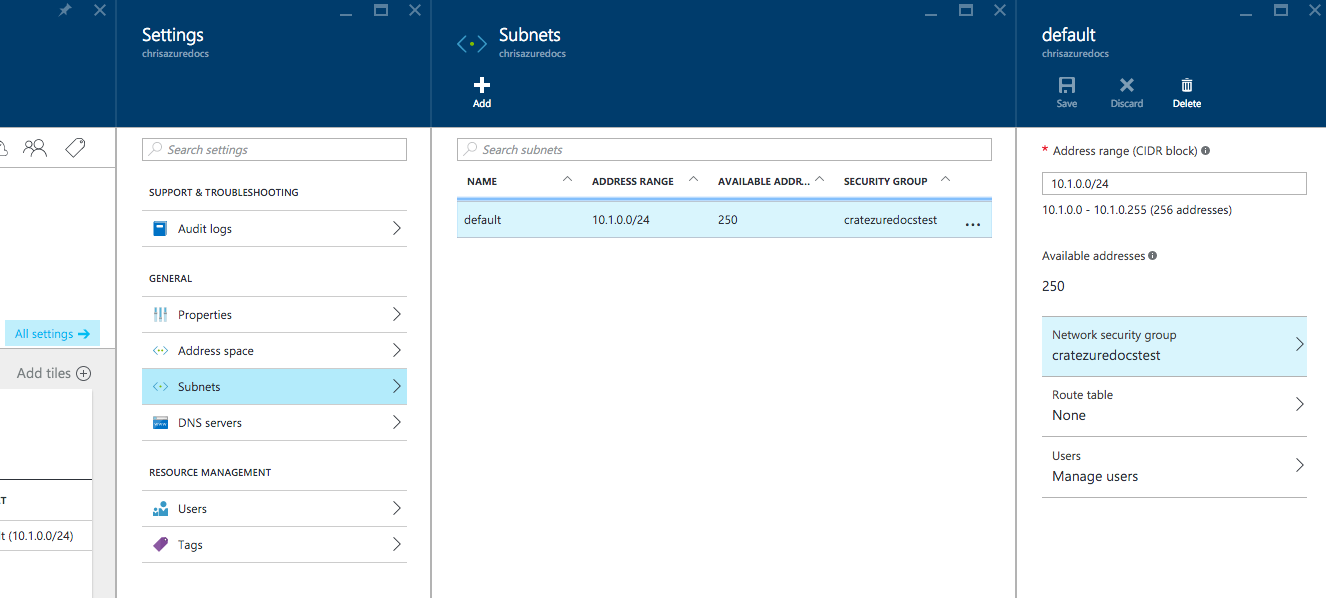
Create a virtual network
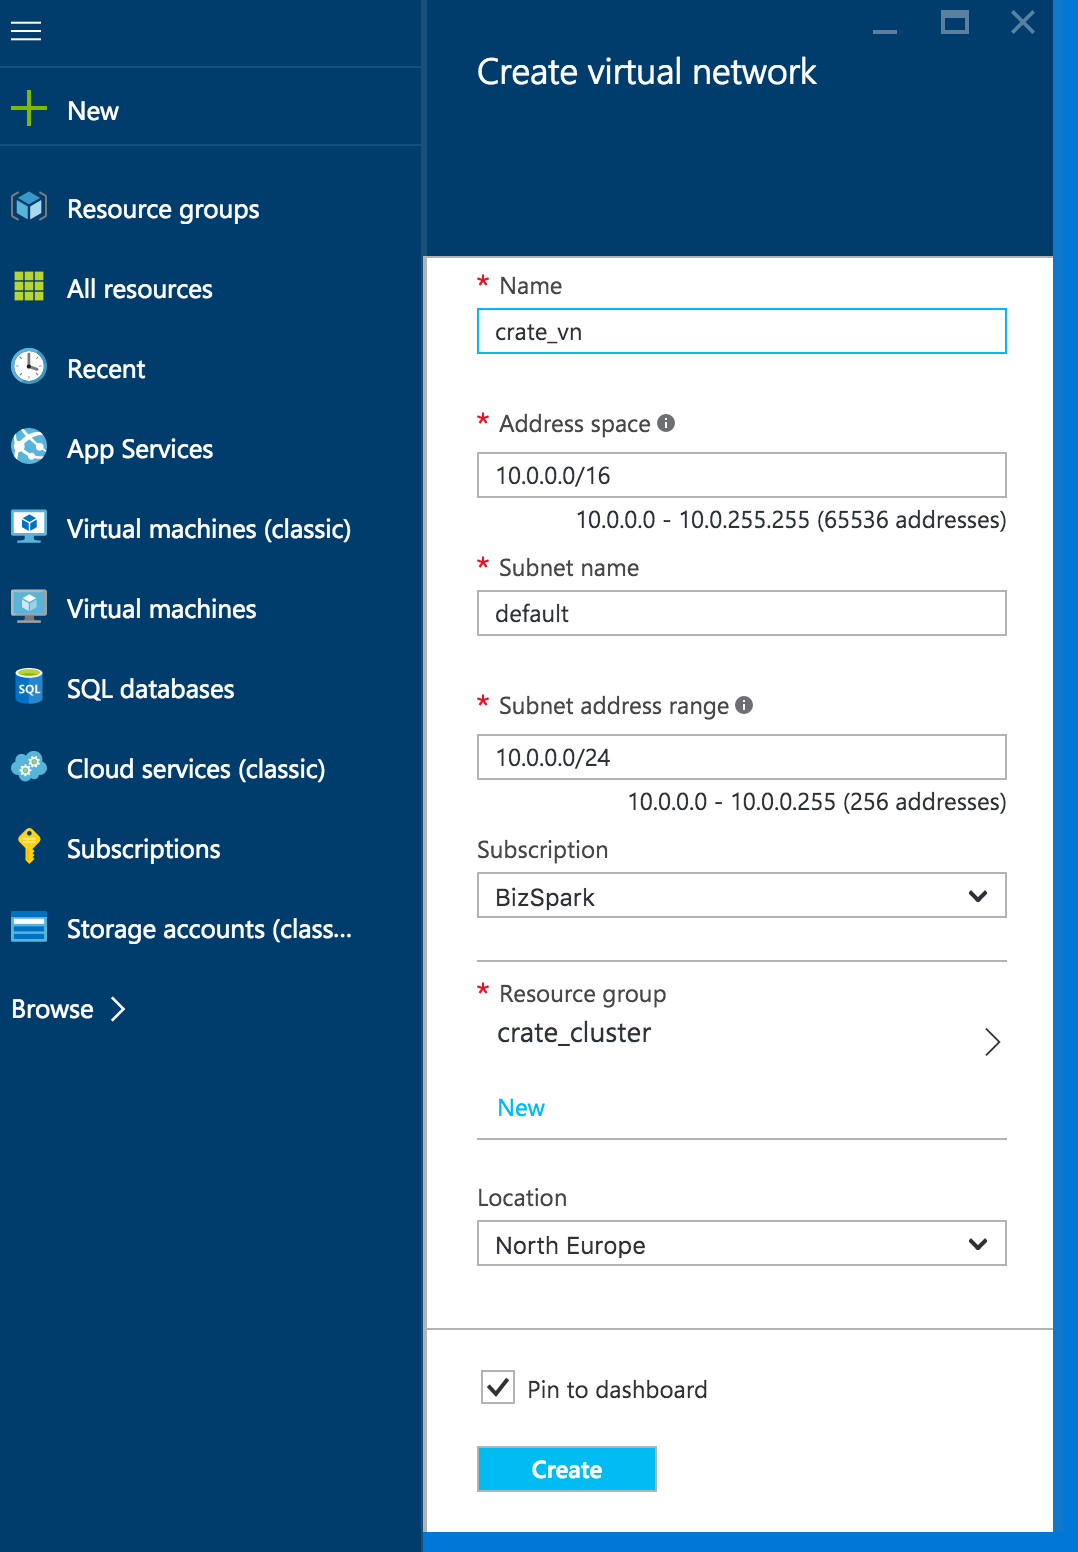
To create a cluster of CrateDB nodes on some cloud hosting providers, CrateDB relies on unicast for inter-node communication.
The easiest way to get Unicast communication working with Azure is to create a Virtual Network (+ -> Networking -> Virtual Network) so that all the cluster nodes exist on the same IP range. Give the network a name, a region and let Azure handle all the remaining settings by clicking the next arrow on each screen.
Once the Virtual Network has been created, find it in your resources list, open the edit screen and the Subnets setting. Add the security group created earlier to the subnet.
Create virtual machines
Next create virtual machines to act as your CrateDB nodes. In this tutorial, I chose two low-specification Ubuntu servers, but you likely have your own preferred configurations.
Most importantly, make sure you select the Virtual Network created earlier.
Install CrateDB
Note that these instructions should be followed on each VM in your cluster.
To Install CrateDB, ssh into your VMs and follow the standard process for Linux installation, this will automatically start an instance of CrateDB, which we will need to restart after the next step.
Configure CrateDB
Note that these instructions should be followed on each VM in your cluster.
To set the Unicast hosts for the CrateDB cluster we change the default configuration file at /etc/crate/crate.yml.
Uncomment / add these lines:
CrateDB Version |
Reference |
Configuration Example |
|---|---|---|
>=4.x |
discovery.seed_hosts:
  - node1.example.com:4300
  - node2.example.com:4300
  - 10.0.1.102:4300
  - 10.0.1.103:4300
|
|
<=3.x |
discovery.zen.ping.unicast.hosts:
  - node1.example.com:4300
  - node2.example.com:4300
  - 10.0.1.102:4300
  - 10.0.1.103:4300
|
Note: You might want to try DNS based discovery for inter-node communication.
Uncomment and set the cluster name
cluster.name: crate
Restart CrateDB service crate restart.
Azure and Windows
Initial setup
To create a Resource Group, Network security group and virtual network, follow the same steps as for Azure and Linux.
Create virtual machines
Similar steps to creating Virtual Machines for Azure and Linux, but create the VM based on a recent “Windows Server LTS” image.
Install CrateDB
Note that these instructions should be followed on each VM in your cluster.
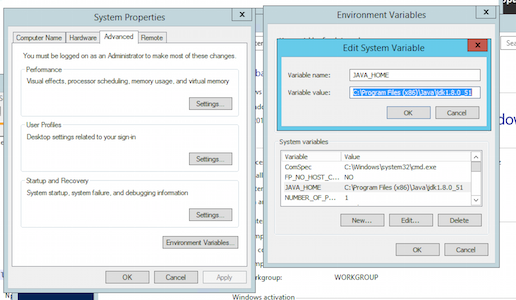
To install CrateDB on Windows Server, you will need a Java JDK installed.
Ensure that the JAVA_HOME environment variable is set.
Next download the CrateDB Tarball, expand it, and move it to a convenient location.
Configure CrateDB and Windows
Note that these instructions need to be followed on each VM in your cluster.
Edit the config/crate.yml configuration file in the expanded directory to make the same changes noted above in running CrateDB on Azure & Linux.
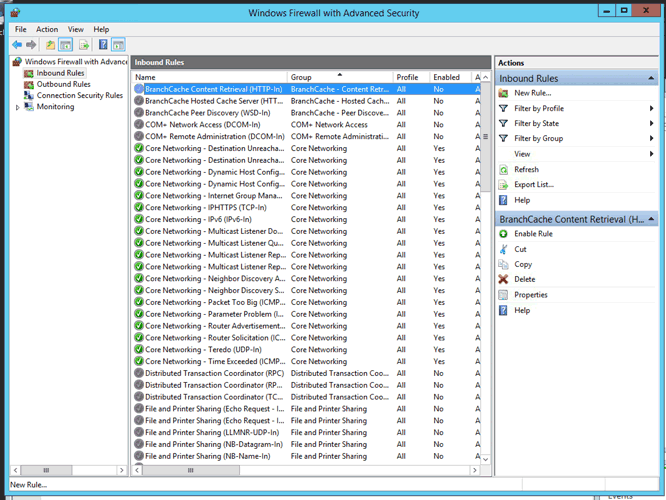
We need to allow the ports CrateDB uses through the Windows Firewall
Start CrateDB by running .\bin\crate.bat (PowerShell) or bin\crate.bat (CMD).