This is the first article of a series of articles on how to harness the power of Apache Airflow with CrateDB, expertly written by Niklas Schmidtmer and Marija Selakovic from CrateDB's Customer Engineering team.
Introduction
In this first part, we introduce Apache Airflow and why we should use it for automating recurring queries in CrateDB. Then, we cover Astronomer, the managed Apache Airflow provider, followed by instructions on how to set up the project with Astronomer CLI. Finally, we illustrate with relatively simple examples how to schedule and execute recurring queries.
Automate CrateDB queries with Apache Airflow
Apache Airflow is a platform for programmatically creating, scheduling, and monitoring workflows [Official documentation]. Workflows are defined as directed acyclic graphs (DAGs) where each node in DAG represents an execution task. It is worth mentioning that each task is executed independently of other tasks and the purpose of DAG is to track the relationships between tasks. DAGs are designed to run on demand and in data intervals (e.g., twice a week).
CrateDB is an open-source distributed database that makes storage and analysis of massive amounts of data simple and efficient. CrateDB offers a high degree of scalability, flexibility, and availability. It supports dynamic schemas, queryable objects, time-series data support, and real-time full-text search over millions of documents in just a few seconds.
As CrateDB is designed to store and analyze massive amounts of data, continuous use of such data is a crucial task in many production applications of CrateDB. Needless to say, Apache Airflow is one of the most heavily used tools for the automation of big data pipelines. It has a very resilient architecture and scalable design. This makes Airflow an excellent tool for the automation of recurring tasks that run on CrateDB.
Astronomer
Since its inception in 2014, the complexity of Apache Airflow and its features has grown significantly. To run Airflow in production, it is no longer sufficient to know only Airflow, but also the underlying infrastructure used for Airflow deployment.
To help maintain complex environments, one can use managed Apache Airflow providers such as Astronomer. Astronomer is one of the main managed providers that allows users to easily run and monitor Apache Airflow deployments. It runs on Kubernetes, abstracts all underlying infrastructure details, and provides a clean interface for constructing and managing different workflows.
Setting up an Airflow project
We set up a new Airflow project on an 8-core machine with 30GB RAM running Ubuntu 22.04 LTS. To initialize the project we use Astronomer CLI. The installation process requires Docker version 18.09 or higher. To install the latest version of the Astronomer CLI on Ubuntu, run:curl -sSL install.astronomer.io | sudo bash -s
To make sure that you installed Astronomer CLI on your machine, run:astro version
If the installation was successful, you will see the output similar to:Astro CLI Version: 1.14.1
To install Astronomer CLI on another operating system, follow the official documentation.
After the successful installation of Astronomer CLI, create and initialize the new project as follows:
- Create project directory:
mkdir astro-project && cd astro-project
- Initialize the project with the following command:
astro dev init
- This will create a skeleton project directory as follows:
├── Dockerfile
├── README.md
├── airflow_settings.yaml
├── dags
├── include
├── packages.txt
├── plugins
├── requirements.txt
└── tests
The astronomer project consists of four Docker containers:
- PostgreSQL server (for configuration/runtime data)
- Airflow scheduler
- Web server for rendering Airflow UI
- Triggerer (running an event loop for deferrable tasks)
The PostgreSQL server is configured to listen on port 5432. The web server is listening on port 8080 and can be accessed via http://localhost:8080/ with admin for both username and password.
In case these ports are already occupied you can change them in the file .astro/config.yaml inside the project folder. In our case we changed the web server port to 8081 and postgres port to 5435:
project:
  name: astro-project
webserver:
  port: 8081
postgres:
  port: 5435
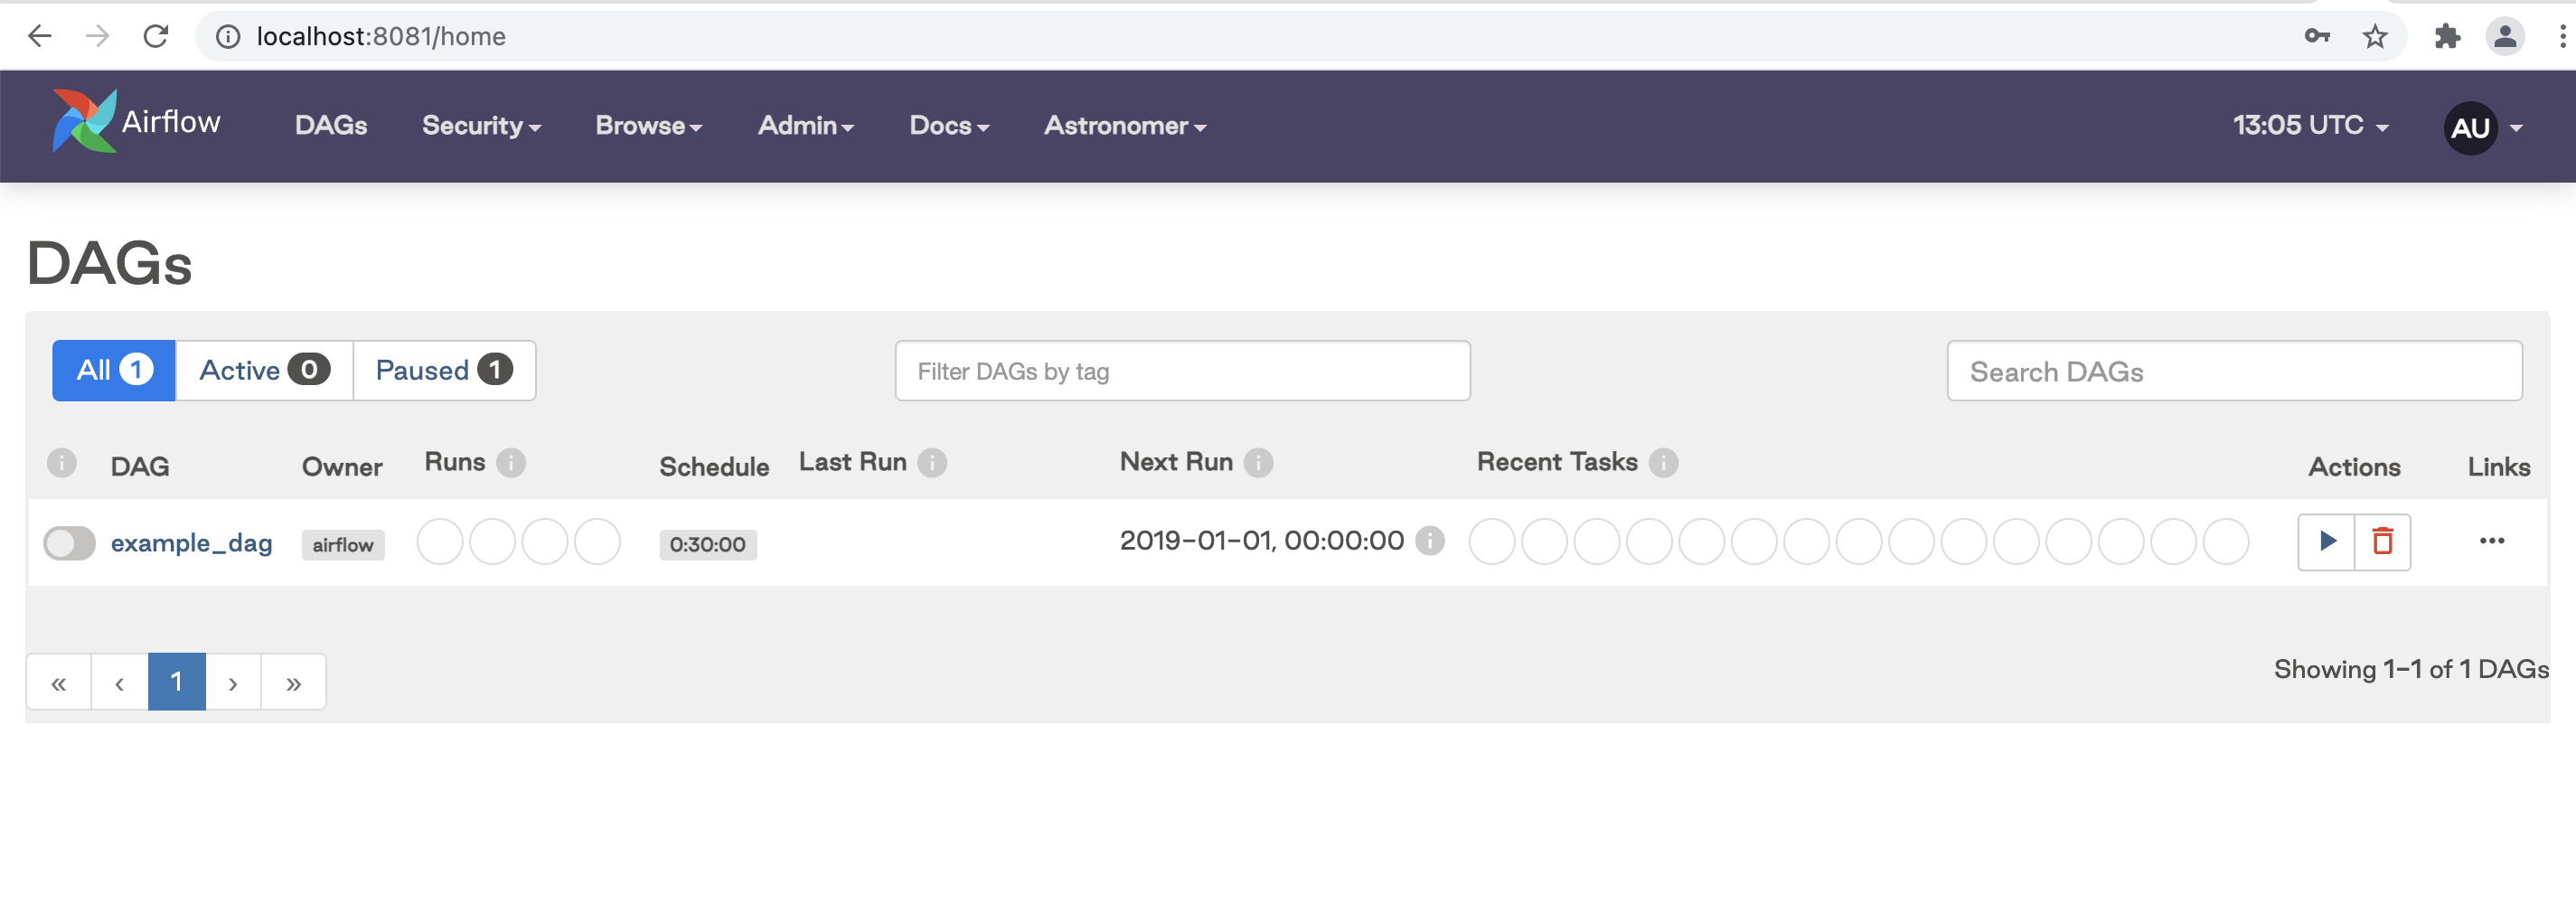
To start the project, run astro dev start. After Docker containers are spun up, access the Airflow UI at http://localhost:8081 as illustrated:

The landing page of Apache Airflow UI shows the list of all DAGs, their status, the time of the next and last run, and the metadata such as the owner and schedule. From the UI, you can manually trigger the DAG with the button in the Actions section, manually pause/unpause DAGs with the toggle button near the DAG name, and filter DAGs by tag. If you click on a specific DAG it will show the graph with tasks and dependencies between each task.
Create a GitHub repository
To track the project with Git, execute from the astro-project directory: git init.
Go to http://github.com and create a new repository. The files that store sensitive information, such as credentials and environment variables should be added to .gitignore. Now, use the following instructions to publish astro-project to GitHub:
git remote add origin https://github.com/username/new_repo
git push -u origin main
The initialized astro-project now has a home on GitHub.
Add database credentials
To configure the connection to CrateDB we need to set up a corresponding environment variable. On Astronomer the environment variable can be set up via the Astronomer UI, via Dockerfile, or via a .env file which is automatically generated during project initialization.
In this tutorial, we will set up the necessary environment variables via a .env file. To learn about alternative ways, please check the Astronomer documentation. The first variable we set is one for the CrateDB connection, as follows:AIRFLOW_CONN_CRATEDB_CONNECTION=postgresql://<CrateDB user name>:<CrateDB user password>@<CrateDB host>/doc?sslmode=disable
In case a TLS connection is required, change sslmode=require. To confirm that a new variable is applied, first, start the Airflow project and then create a bash session in the scheduler container by running docker exec -it <scheduler_container_name> /bin/bash.
To check all environment variables that are applied, run env.
This will output some variables set by Astronomer by default including the variable for the CrateDB connection.
Use Case: Export Data to a Remote Filesystem
The first use case we are going to cover in this series of articles is the automation of daily data export to a remote filesystem. The idea is to report data collected from the previous day to the Amazon Simple Storage Service (Amazon S3). To illustrate this example, we first create a new bucket on S3 called crate-astro-tutorial. The official documentation on how to create a new bucket can be found here.
Next, we set up two environment variables for storing AWS credentials (Access Key ID and Secret Access Key) in the .env file:
ACCESS_KEY_ID=""
SECRET_ACCESS_KEY=""
We base our use case on table data that has the following schema:
CREATE TABLE IF NOT EXISTS "metrics" (
  "hash_id" BIGINT,
  "timestamp" TIMESTAMP WITH TIME ZONE,
  "name" TEXT,
  "tags" OBJECT(DYNAMIC),
  "fields" OBJECT(DYNAMIC),
  "month" TIMESTAMP AS date_trunc('quarter', "timestamp")
)
In general, to export data to a file one can use the COPY TO statement in CrateDB. This command exports the content of a table to one or more JSON files in a given directory. JSON files have unique names and they are formatted to contain one table row per line. The TO clause specifies the URI string of the output location. CrateDB supports two URI schemes: file and s3. We use the s3 scheme to access the bucket on Amazon S3. Further information on different clauses of the COPY TO statement can be found in the official CrateDB documentation.
To export data from the metrics table to S3, we need a statement such as:COPY metrics TO DIRECTORY 's3://[{access_key}:{secret_key}@]<bucketname>/<path>'
DAG implementation
In order to build a generic DAG that is not specific to one single table configuration, we first create a file include/table_exports.py, containing a list of dictionaries (key/value pairs) for each table to export:
TABLES = [
    {
        # fully-qualified name of the table to export
        "table": "doc.metrics",
        # name of the timestamp column to use for filtering the export
        "timestamp_column": "timestamp",
        # name and path of the target S3 bucket
        "target_bucket": "crate-astro-tutorial/metrics",
    }
]
The DAG itself is specified as a Python file astro-project/dags. It loads the above-defined TABLES list and iterates over it. For each entry, a corresponding SQLExecuteQueryOperator is instantiated, which will perform the actual export during execution. If the TABLES list contains more than one element, Airflow will be able to process the corresponding exports in parallel, as there are no dependencies between them.
The resulting DAG code is as follows (see the GitHub repository for the complete project):
import os import pendulum from airflow.decorators import dag, task_group from airflow.providers.common.sql.operators.sql import SQLExecuteQueryOperator from airflow.operators.empty import EmptyOperator from airflow.models.baseoperator import chain from include.table_exports import TABLES @task_group def export_tables(): for export_table in TABLES: SQLExecuteQueryOperator( task_id=f"copy_{export_table['table']}", conn_id="cratedb_connection", sql=""" COPY {{params.table}} WHERE DATE_TRUNC('day', {{params.timestamp_column}}) = '{{macros.ds_add(ds, -1)}}' TO DIRECTORY 's3://:{{params.secret}}@{{params.target_bucket}}-{{macros.ds_add(ds, -1)}}'; """, params={ "table": export_table["table"], "timestamp_column": export_table["timestamp_column"], "target_bucket": export_table["target_bucket"], "access": os.environ.get("ACCESS_KEY_ID"), "secret": os.environ.get("SECRET_ACCESS_KEY"), }, ) @dag( start_date=pendulum.datetime(2021, 11, 11, tz="UTC"), schedule="@daily", catchup=False, ) def table_export(): start = EmptyOperator(task_id="start") end = EmptyOperator(task_id="end") tg1 = export_tables() chain(start, tg1, end) table_export()
The DAG has a unique ID, start date, and schedule interval and is composed of one task per table. It runs daily every day starting at 00:00.
To inject the date for which to export data, we use the ds macro in Apache Airflow. This macro gives the logical date, not the actual date based on wall clock time. To make the task idempotent with regard to execution time, it is the best practice to always use the logical date or timestamp.
Based on the timestamp_column, a corresponding WHERE clause gets constructed to restrict the export to only data from the previous day.
The target_bucket gets extended with the date of the logical execution timestamp so that each DAG execution will copy files into a separate directory.
DAG execution
The next step is to restart the Docker containers and go to the Airflow UI. Besides the example_dag that is automatically generated during project initialization, you should also see cratedb_table_export which we trigger manually, as illustrated:

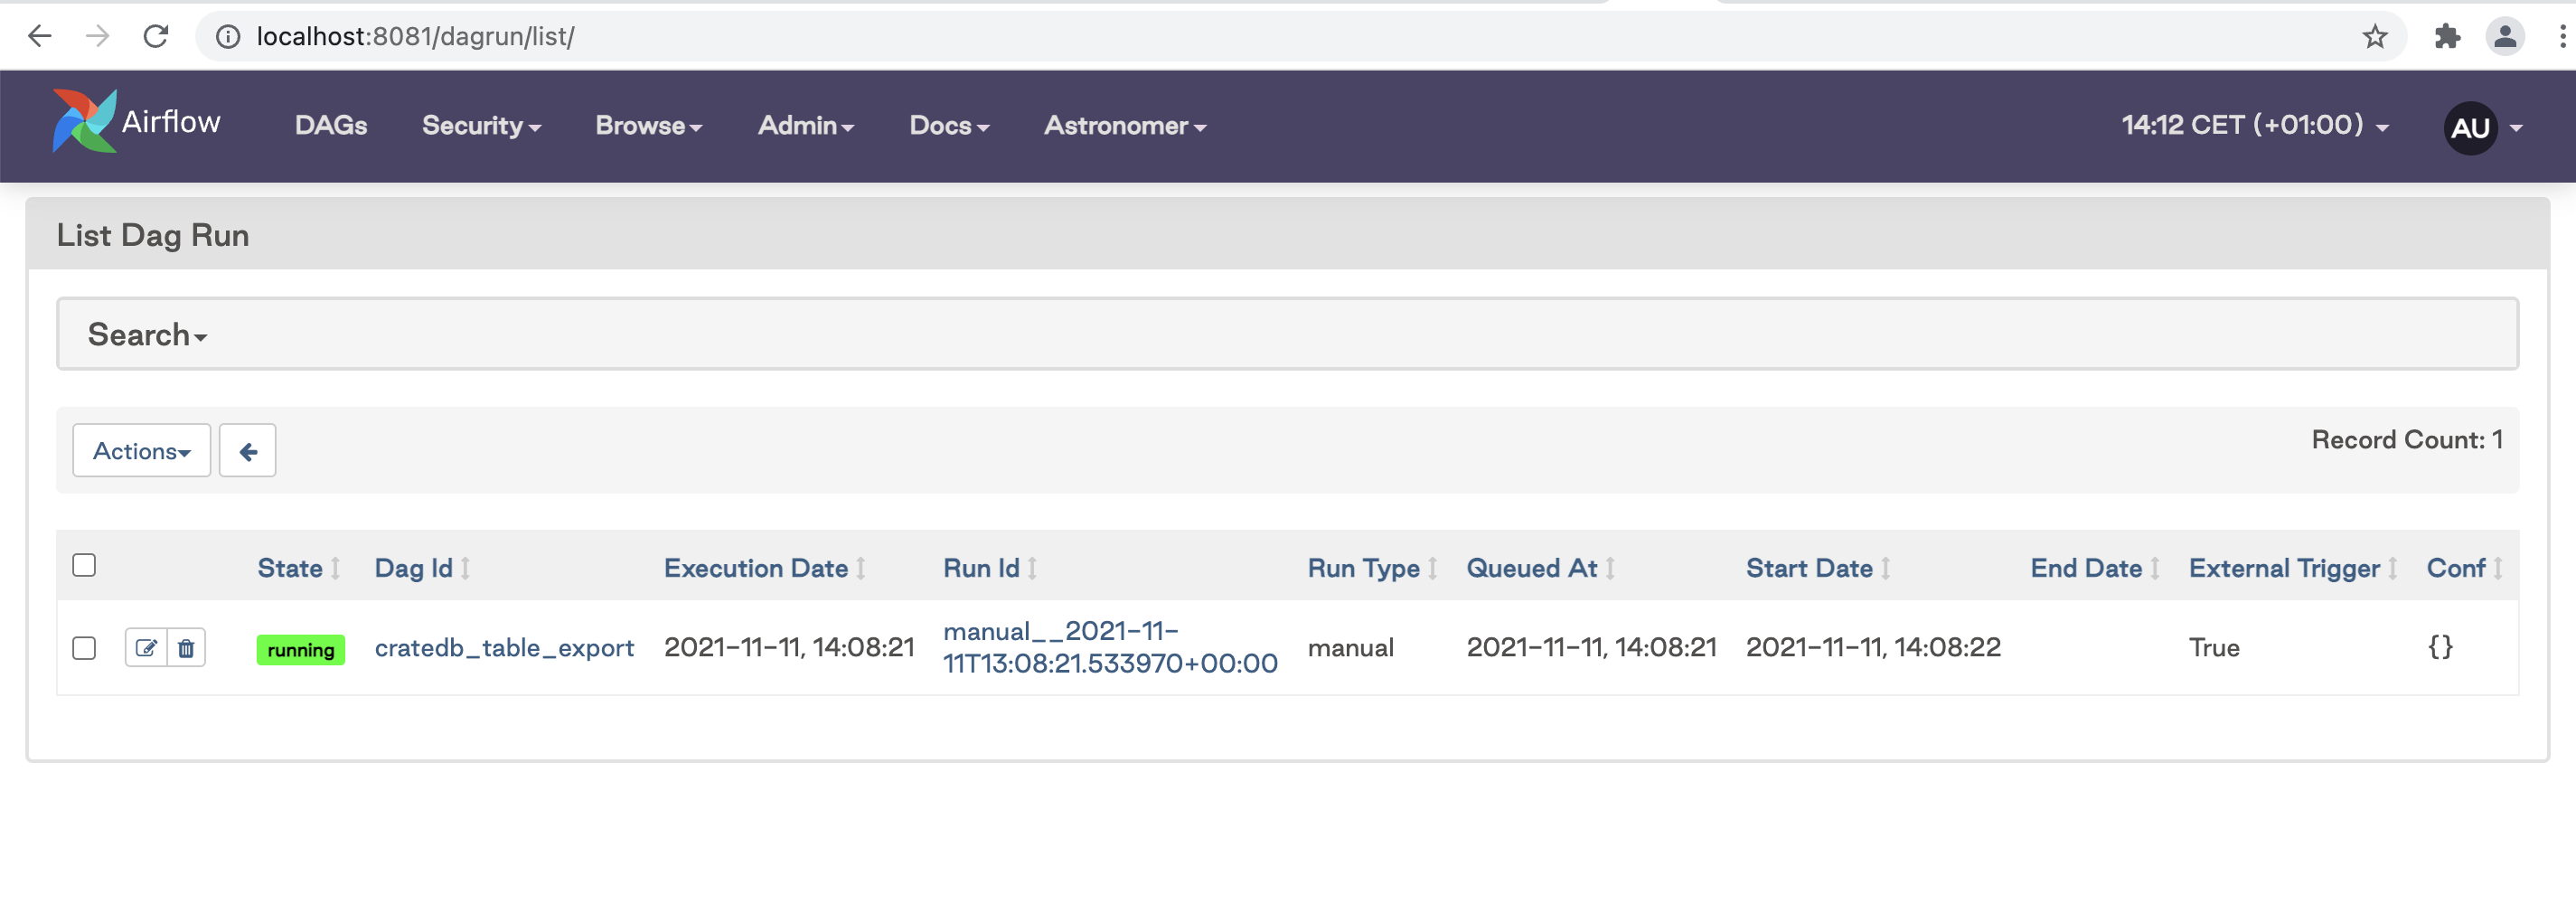
To find more details about running DAGs, go to Browse/DAG runs which opens a new window with details of the running DAGs, such as state, execution data, and run type:
 After a successful DAG execution, the data will be stored on the remote filesystem.
Summary
This article covered a simple use case: periodic data export to a remote filesystem. In the following articles, we will cover more complex use cases composed of several tasks based on real-world scenarios. If you want to try our examples with Apache Airflow and Astronomer, you are free to check out the code on the public GitHub repository.


